Editing Mesh Inserts
In this section:
Preparation
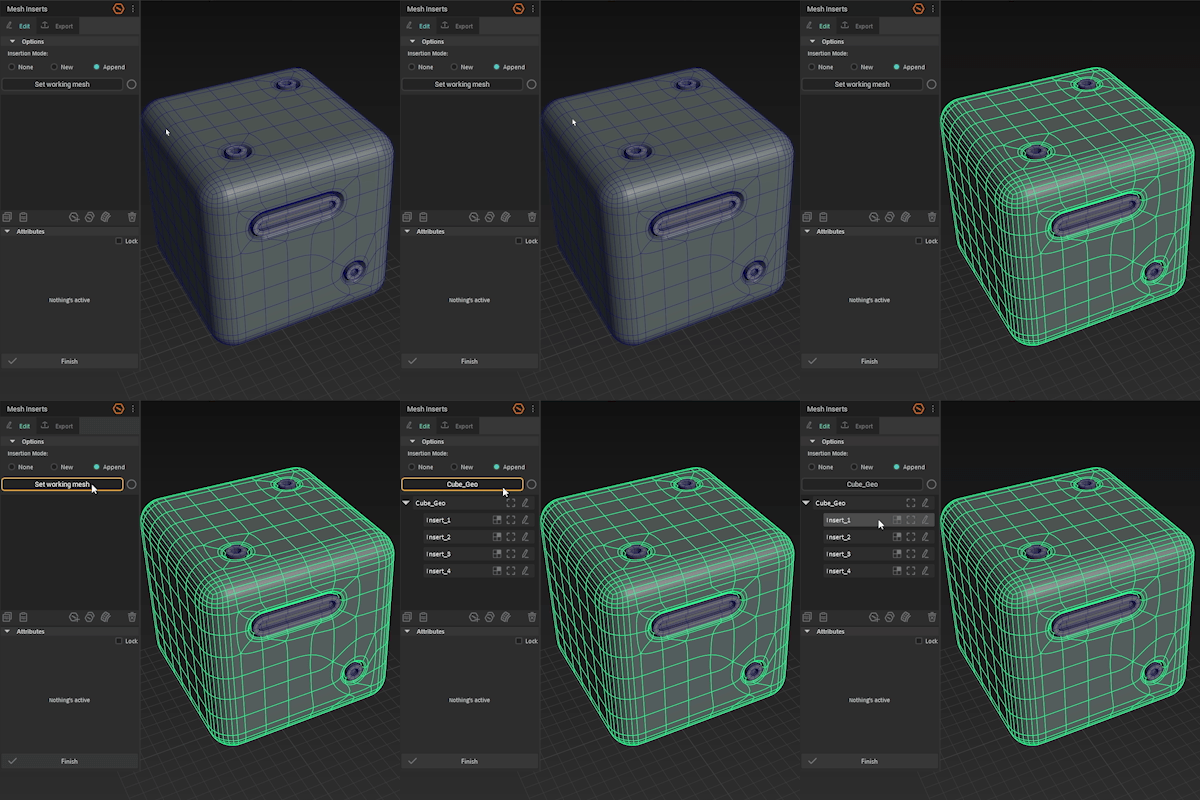
Select your working mesh to list its MI components.
Editing The Mesh Insert
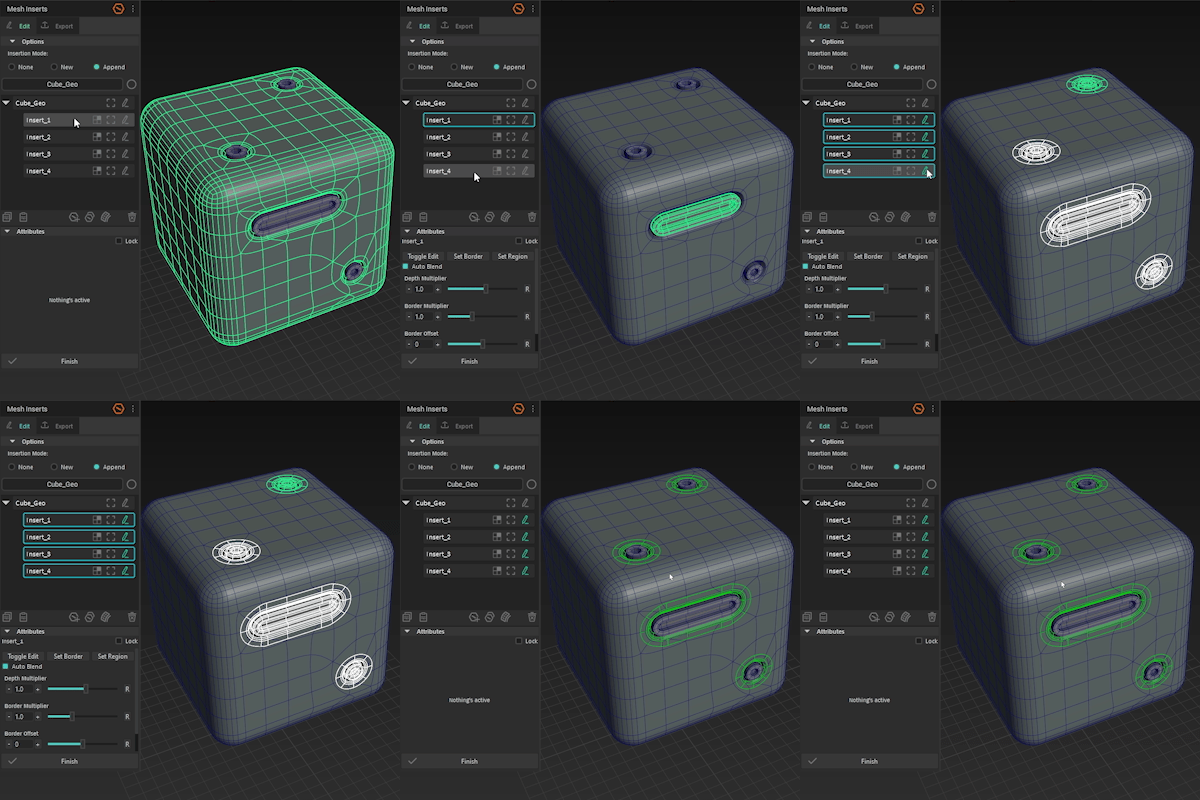
Select one or more (hold down Shift or Ctrl) of the components. And click the edit icon in the list to expose the meshes of the MIs.
Do your modeling/editing on the exposed mesh.
Editing Border
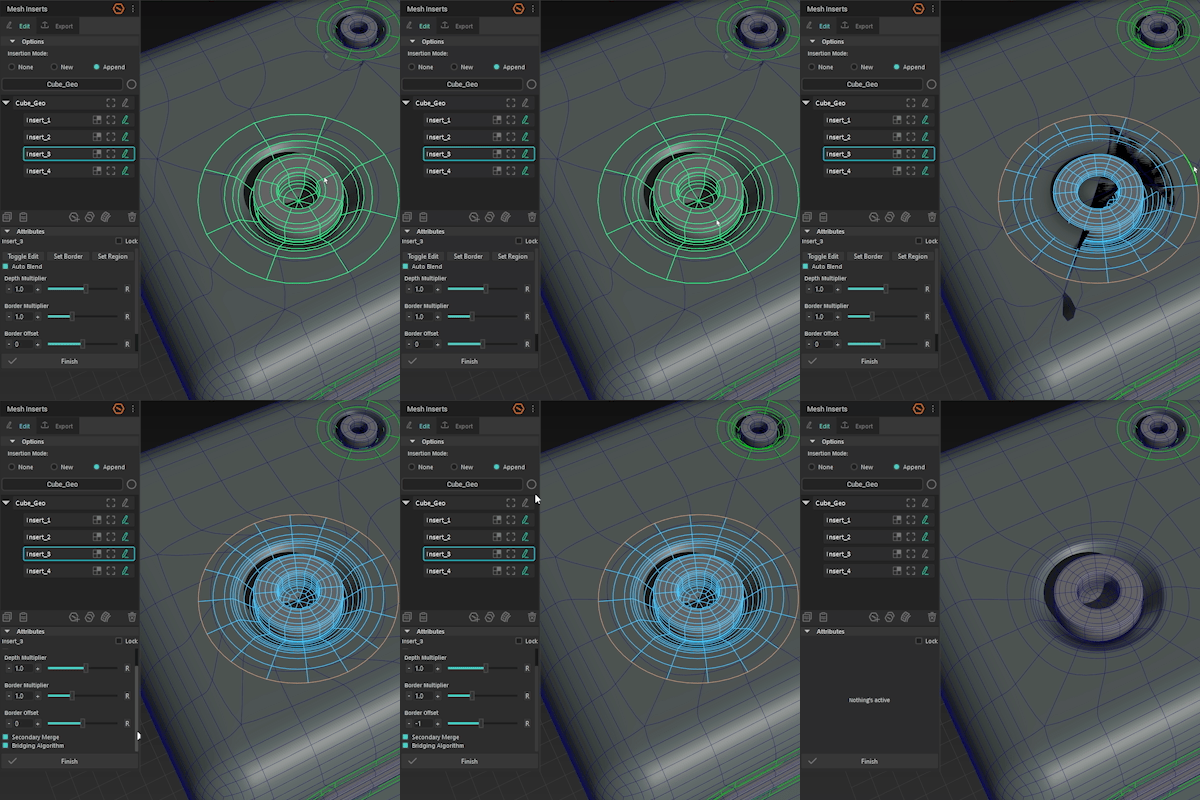
If you modified the MI mesh in a way that threw off the border topology, you can reassign it by selecting the border edge of the MI while in edit mode and click Set Border in the attributes section.
Editing Blend Region
Whenever you do not want the auto-blending to pick unwanted faces, you can assign a blending region to a particular MI.
Firstly, click on the edit icon of the Source Object component to expose it for editing.
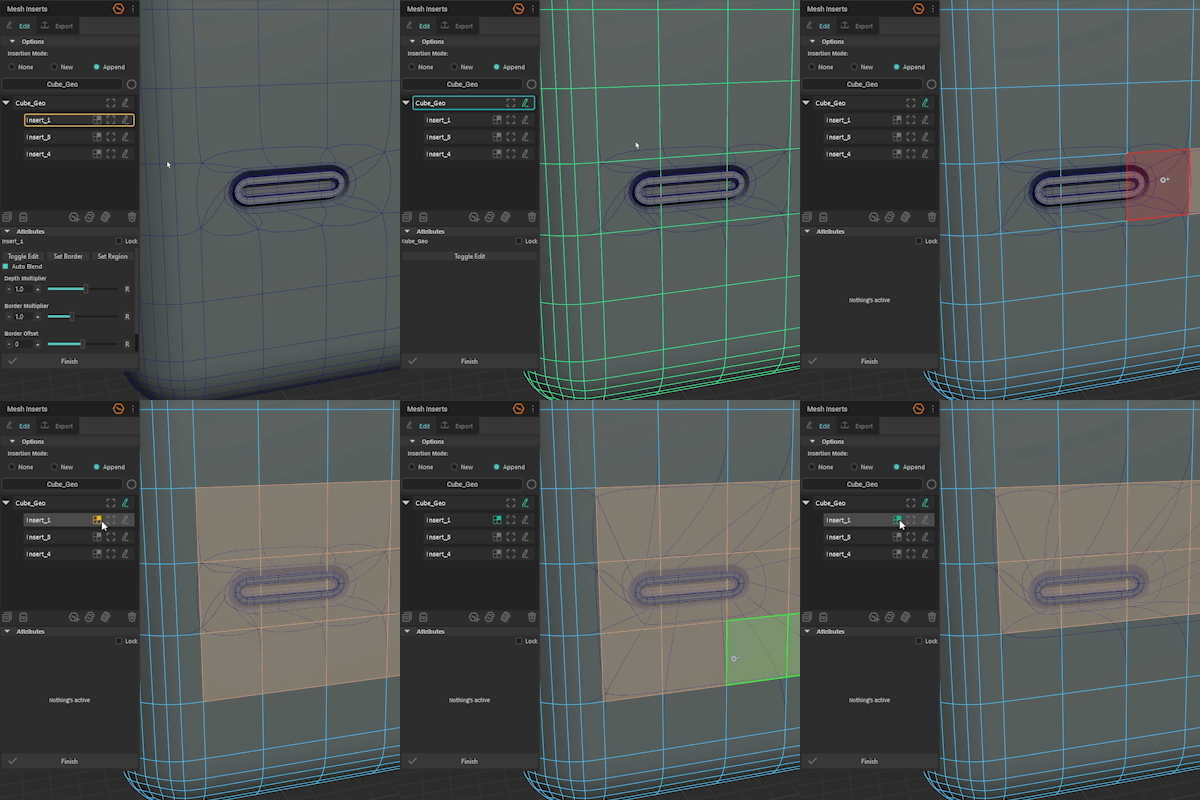
Method 1:
-
Select the faces you would wish to blend with the MI.
-
Click on the set region icon.
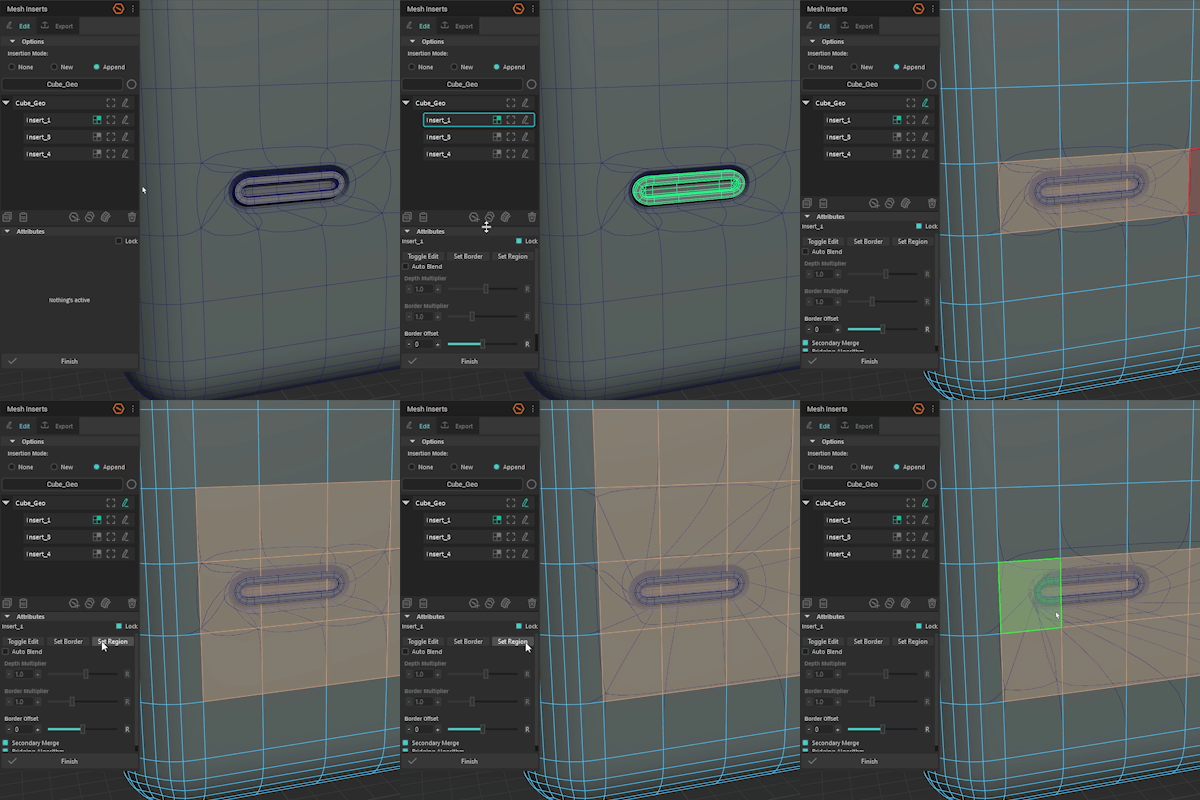
Method 2:
-
Select a MI component and click Lock checkbox in the attributes panel to keep the UI locked.
-
Disable the auto-blend.
-
Select the faces on the Source Object and click Set Region button in the attributes section to assign the faces. Adjust and repeat as many times as necessary.
Editing Source Object
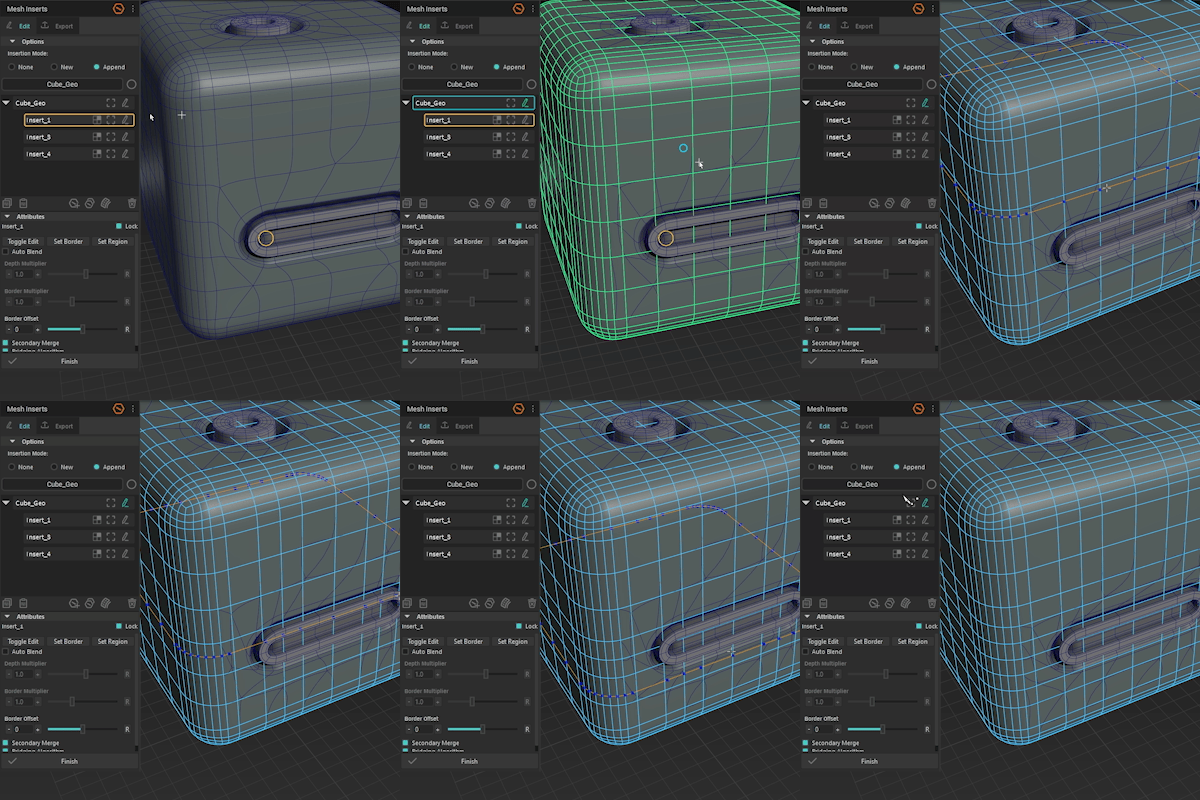
Click on the edit mode icon over any Source Object component of the working mesh to expose the underlying source mesh and adjust as necessary.
⚠️ Refrain from editing the actual working mesh with an active MI stack! This will cause unwanted geometry behavior if you decide to edit its MIs afterward. It is recommended to finalize first.